Installing VirtManager
-
Issue this command:
sudo dnf install virt-manager iptables -
Add your user to the
qemuandlibvirtgroups. For example, if your user isme, you would issue these commands:sudo usermod -a -G qemu me sudo usermod -a -G libvirt me -
The last requirement is to have the
libvirtd.servicerunning. By default in OpenMandriva, this is already set to run on boot. Since you have to reboot anyway after modifying the groups in the previous step, reboot now.
Configuring VirtManager
VirtManager has a quirky, strange interface. Before you start, you should understand some concepts.
Storage Pool: VirtManager storage pools are pre-defined directories where it looks for resources the VM needs, such as ISO files and disk images.
You need at least two storage pools: one containing ISO files for installation, and one to store your virtual machines’ disk images. You can create as many storage pools as you want, but at a minimum, you need these two.
Unfortunately, the storage pool that’s configured by default points to a folder in your system’s var directory. This is not a good default, and not a good place in which to store disk images. You will, therefore have to configure two storage pools.
The other unfortunate thing is there’s no way to create the storage pools ahead of time. You have to do it while setting up your first VM. Once you’ve set up your storage pools the first time, you don’t have to do it again.
The procedure below begins the wizard and leads you through setting up two storage pools: one for ISOs, and one for disk images. In the future, as long as you download your ISOs to the directory specified in the ISO storage pool, you’ll always have access to your ISOs from within VirtManager.
-
Launch VirtManager. QEMU/KVM appears. If it complains that
libvirtdis not running, issue this command:sudo systemctl enable --now libvirtd.service -
Double-click the message QEMU/KVM - Not Connected. Once connected, the message changes to QEMU/KVM.
-
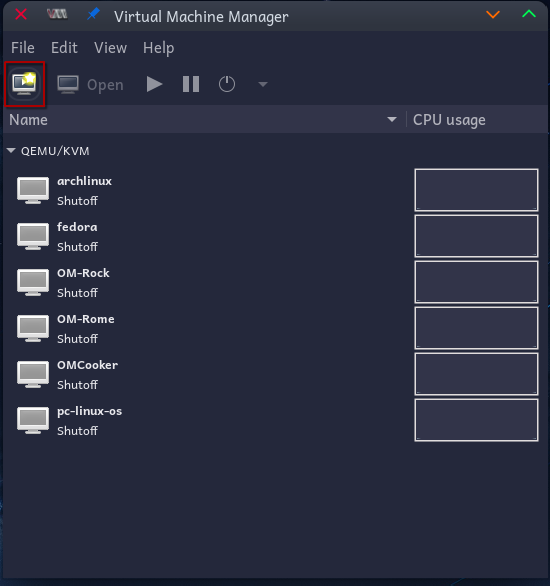
Click the left-most button in the toolbar to create a virtual machine.
-
Choose Local Install Media and click Forward.
-
Under Choose ISO or CDROM install media, click Browse.
This is where you’ll set up your storage pools, not just for this VM, but for all future VMs. The dialog looks like this:
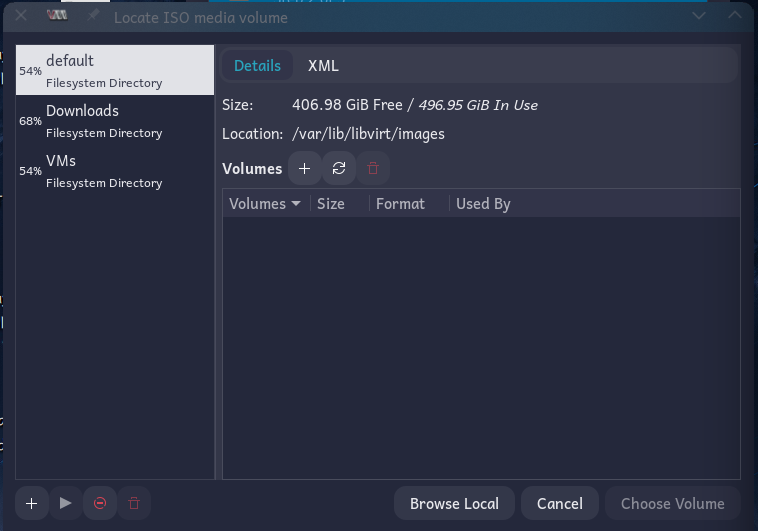
On the left, you have directories that can be registered. By default, only the first one, pointing to var/lib/libvirt/images will be there. This is the unfortunate default; you’ll never use this.
Create two directories in your file manager: one for downloaded ISOs, and one for your VM disk images:
-
In your filesystem, decide where you want to keep your downloaded ISOs, and make that folder/directory. This is usually somewhere in your home directory.
-
In your filesystem, decide where you want to keep your VM disk images, and make that folder/directory. This is usually somewhere in your home directory.
Examples:
- ISO directory:
/home/me/Downloads/Linux - VM directory:
/home/me/VMs
- ISO directory:
-
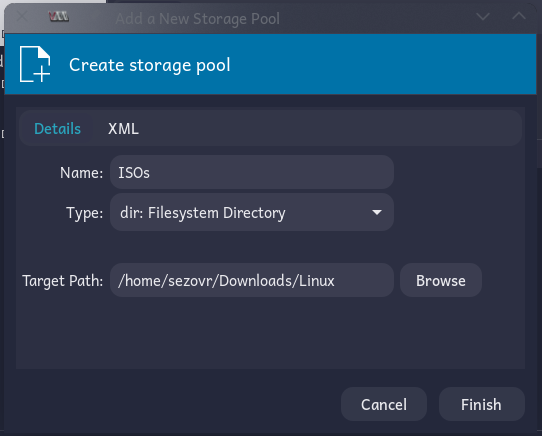
Come back to the dialog pictured above. Click the + button on the bottom left.
-
In the dialog that appears, give your storage pool a name. Then click the Browse button and navigate to the directory you created above for your downloaded ISOs. Click Finish. Your first storage pool is created.
-
Repeat the process for the disk images directory you created above.
You’ve now set up VirtManager to point to where you’ll store all future virtual machines and ISO installers. You won’t have to do these steps again.
Creating Your First Virtual Machine
You’re still in the wizard for creating a new virtual machine. It’s now waiting for you to select an ISO for your new VM.
-
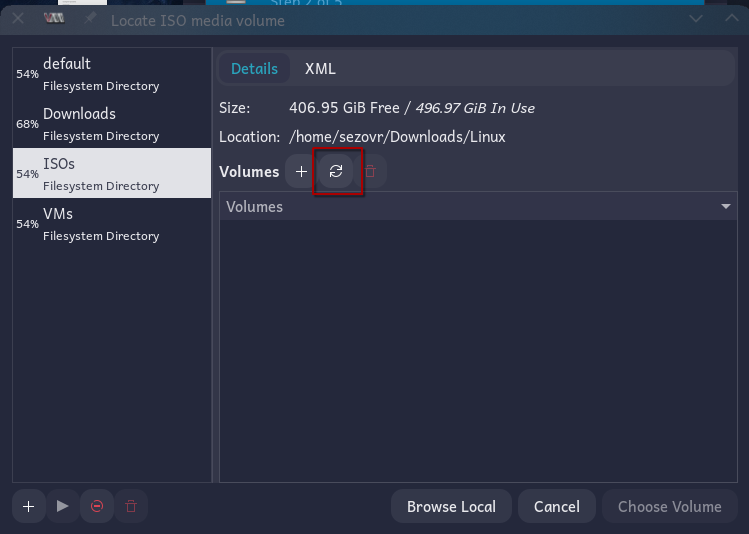
Now you can navigate to your ISOs directory by clicking its storage pool on the left. If you named yours as in the example above, click the ISOs pool.
-
If nothing appears, click the Refresh button.
-
The ISOs now appear in the list. Choose the ISO you want and click Choose Volume.
-
Now you’re back to the wizard with the ISO selected. For OpenMandriva, VirtManager fails to detect the OS, so de-select Automatically detect from the installation media / source, and in the field above that, type Generic, and then select Generic Linux 2022. Click Forward.
-
Choose the amount of memory and CPUs you want to dedicate to this VM. The defaults are 4GB and 2 CPUs. Click Forward.
-
Now it’s time to create a disk image. You do not want to accept the default. Instead, click Select or create custom storage, and then select the Manage… button.
-
Now you see that dialog you worked with before to create your storage pools. On the left, select the VMs storage pool you created earlier.
-
This storage pool now appears on the right. If you have any doubt that files in here are not appearing, click that Refresh button you used before.
-
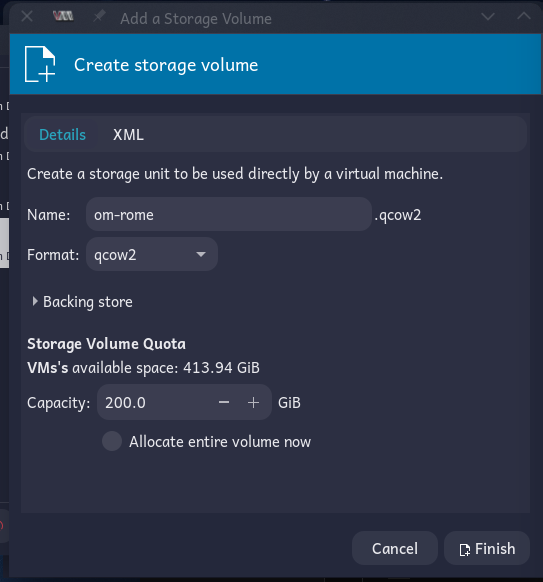
To create a new disk image for your VM, click the + button next to Volumes.
-
Give your disk image a name; for example,
om-rome. -
Choose the size of your disk image. When done, click Finish.
-
Now you’re back to the previous dialog. Make sure your new disk image is selected and click Choose Volume.
-
Now you’re back to the wizard. Click Forward.
-
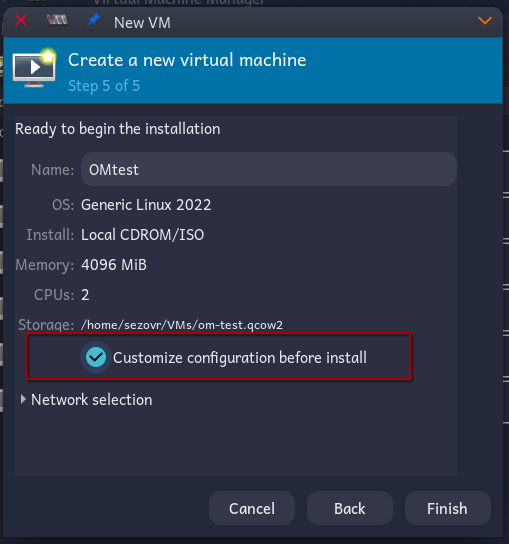
Give your VM a name (it defaults to “linux2022”, which you don’t want), and VERY IMPORTANT: select Customize configuration before install.
-
Click Finish.
-
Now the VM configuration dialog appears. At the bottom is a drop-down for choosing the firmware. It defaults to BIOS. Choose UEFI instead, and then click Begin Installation.
-
Your VM appears and boots!

After you install, you can use the same procedure to create more VMs. Download your ISOs to the directory specified in your ISO storage pool, and keep your disk images in the VMs storage pool. Clean them out as needed. You can create as many VMs as you have storage for. Eventually, your VirtManager will have several VMs:
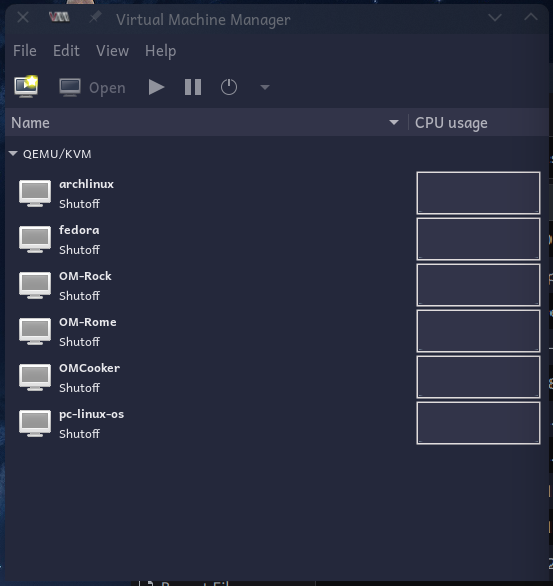
To launch a VM, double-click it, and then click its Play button.